| Pretty Fall Paint Shop Pro Tutorial |
|

Paint Shop Pro
Tutorial
I used Version 5x
but I am reasonably sure it can be done in many other
versions as well. You must have some knowledge of
Paint Shop Pro
by
Jane's Haven
Any Questions?
Contact Us.
Supplies
Scrap Kit is from the beautiful work of, click here
It is included in the zip
A tube, the one I am usiings came from Here, you must purchase a license.
Paint Shop Pro, any version
Download supplies
The scrap kit is in the zip.
Please pay her a visit to find all kinds of goodies.
Unzip the supplies, if you wish you can open in PSP
Use My Fat Pencil to drag to the line in the tutorial, to keep your place.

|
| 1. Open a new transparent image ,siz , 700x700. |
| |
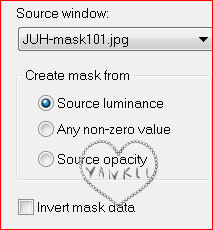
2. Add a new layer, select all, copy ,and ,paste ,paper ,3 ,into selection, select none, open the mask in workspace, go ,to layers, new mask layer, from image, Use the settings below and merge group. Using the pick tool, grab the mask layer to adjust the size, smaller.

|
|
| 3. Open frame07, copy and paste as a new layer, using the pick tool, strech the frame out a bit. Click inside with the magic wand, go to expand and expand by10. Add a new layer under the frame,with paper 08 copy and past into selection. Deselect and add a drop Shadow as example below. |
|
4. Open element 03 copy and paste as a new layer resize 70%, place on the right side,add a drop shadow with these settings

|
| |
| 5. Open element 09, copy and paste as a new layer, place the bow on the left on the frame, add the drop shadow. |
| |
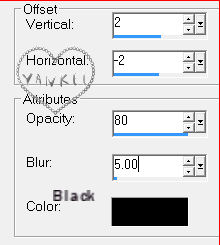
| 6. Open element 21, resize 50%, copy and paste as a new layer, move to the bottom left, Add a drop Shadow, H 2 and V-2, opacity, 80, blur 5, colar, black. |
| |
| 7. Open element 12, resize 50%, copy and paste as a new layer, move to the bottom left, next to element 12, Add a drop Shadow, H 2 andV-2, opacity, 80, blur 5, colar, black. |
| |
| 8. Copy and paste as a new layer, element 15, resize 50%, rotate 90 degrees left, mirror, it goes on the left, add a drop shadow. |
| |
| 9. Copy element 18, resize 50%, place at the bottom under the elements, 12 and , add a drop shadow. |
| |
10. Listed below are the elements I used to complete the tag.
element 25-resize 40 percent, place on the right, add drop shadow.
element 02, resize 40 percent place on the right over element 25, drop shadow, duplicate, mirror. Place on the left.
element 11, resize 40 percent, place on the left, add a drop shadoe.
element 06, resize 40 percent, place on the left over thee two flowers, add a drop shadow.
elemednt 44, resize 40 percent, place at the top, add a drop shadow.
element 10, resize 30 percent, place at ,the top under the light color bow, add a drop shadow. |
| |
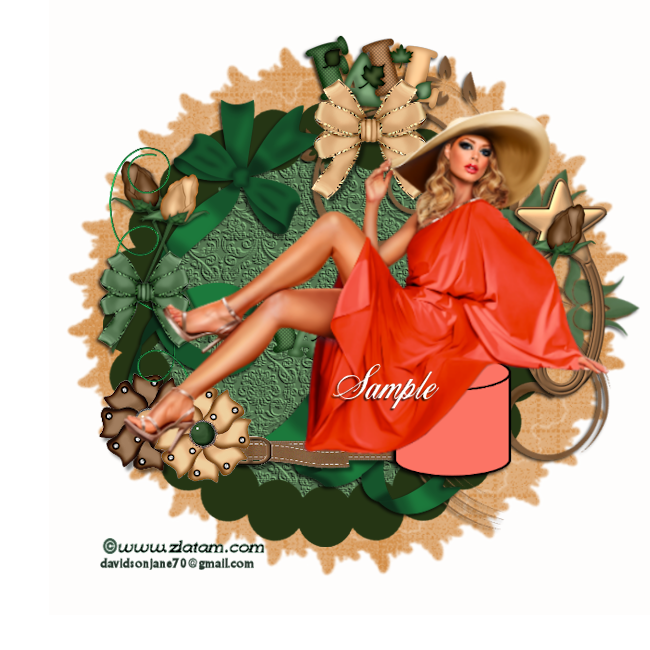
11. Add your main tube, place kinda in the center, add a drop shadow. Copy and paste the stool as a new layer, under the main tube, so it looks like she is sitting on it. Don't forget the copyright and your name.
I resized all layers to, 6500X650
Save as a ping. |
©by Jane's
Haven all Rights Reserved Except Where Otherwise Stated.